

The Shroudbreaker (Quest)
“Great Ramsey’s Ghost! I heard all the stories, but to actually hold the Shroudbreaker in my hands… I never thought I would see the day.”
The Shroudbreaker is the first Tall Tale in the Shores of Gold Arc. The Tale Book can be voted for on the table next to the Mysterious Stranger in the Tavern of any Outpost.
You can unlock three Checkpoints during this Tall Tale. If you wish to continue the Tall Tale at a later time, they can vote on any acquired Checkpoints at the Voyage Table.
While there are a lot of steps in the Shroudbreaker voyage as part of the Shores of Gold Tall Tale, the first puzzle in the Shroudbreaker Tall Tale is fairly simple.
The steps in this quest are as follows:
- Receive the journal
- Learn the fate of the Magpie’s Wing and track it down
- Collect the ship’s log from the captain’s room
- Read the route the Magpie’s Wing took and where they dropped the ancient chest
- Go to the island and retrieve the ancient chest
- Take the totem and the map from the chest
- Look at the map and figure out which island is shown
- Sail to the island and search for a spot to place the totem
- Enter the vault, Light the four braziers and press the button
- Use the journal to input the correct symbols using the spinning blocks
- Figure out where the image shown on the table is located on the island
- Go to the spot and dig up or pick up the medallion
- Insert the medallion into the table, repeat this two more times to get the Shroudbreaker
- Return to any Outpost and deliver the Shroudbreaker to the Mysterious Stranger
The first task will be to read through the journal and learn where the Magpie’s Wing went down.
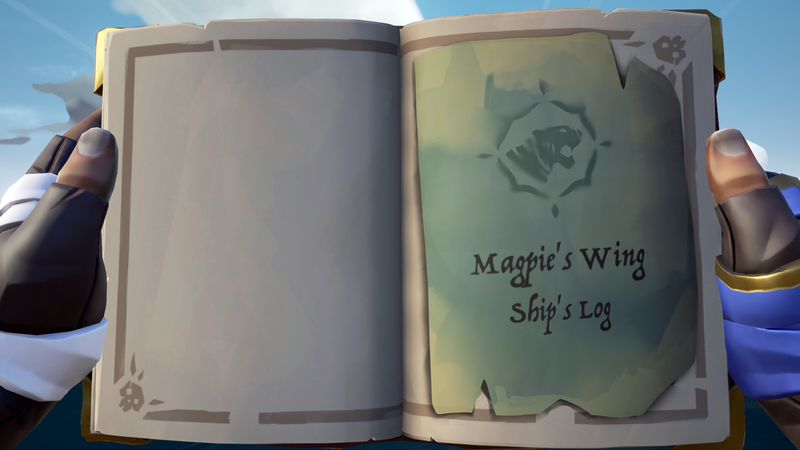
You’re going to receive a quest book when you embark on your first adventure in the questline, and the details will always lead you to the Uncharted Island at N13
“The jagged spires of Crooked Masts to the fore, Old Crook’s Hollow to the aft.” so head there and dive underwater on the north side to grab the log.
When you have acquired the Ancient Chest, you will find additional Tale Book pages and a Totem Key inside. The additional pages give you clues regarding the Totem Vault’s location and cryptic hieroglyphs to help you solve the Puzzle of the Vault. The second Checkpoint of the Tall Tale is unlocked after picking up the Totem Key. When the second Checkpoint is voted for at the Voyage Table a Totem Key will appear on the Table.
There are a total of 6 different Totem Keys and Totem Vaults that the player can acquire at this step of the Tall Tale. The possible Key items are: The Moon Totem, Scarab Totem, Snake Totem, Shark Totem, Crab Totem, Boar Totem. The first additional page of the Journal will clue you in on the Island of the Totem Vault matching the Totem Key.
The next riddle in this quest is near the end – when you manage to open the ancient cave with your totem. Open up our Sea of Thieves Totem sheet if you need help figuring out where each one is.
Totem Vault
When you have managed to locate and open the Totem Vault, proceed inside, but be careful as traps and puzzles await you! Every Totem Vault has two puzzles to overcome: A Pillar Puzzle and a Medallion Puzzle.
Both of these puzzles are accompanied by their own dangers. Overcome these challenges and you will find what you were looking for inside the Vault! It it recommended that you read ahead as the first puzzle is timed and failure means starting over from the beginning of the quest.

After solving all the Puzzles of the Totem Vault and retrieving its Treasure, the Crew will be awarded the Vault of the Ancients Commendation and unlock the third and final Checkpoint.
The Pillar Puzzle
Once inside the Vault itself, you will have to first find a way to activate its mechanisms. Looking around the room should give you visible message prompts on what may be needed.
The four Pillars will light up if you have managed to activate the mechanisms correctly, after which water will start filling up the room and you will have to solve three rounds of Puzzles regarding the correct placement and order of the four Pillars in the room.
Take a look at the last page of your Tale Book. It should give you all the information you need for solving this part of the puzzle. There are at least three rounds of the puzzle. You have to Enter the Solution manually at the Table by pressing the hand Button.
If you cannot manage to solve the puzzle in time, the vault will completely fill up with water leaving you locked in and you will immediately fail the Tall Tale.
The Medallion Puzzle
The next part of the Totem Vault is to find three Totem Medallions hidden in specific locations of each Totem island. After you have successfully solved the Pillar Puzzle, you will see cloudy apparitions on the central table pointing you towards specific landmarks.
Watch out, as these Medallions are protected by ancient guardians! Stock up on some health items and retrieve the Medallions to the Vault Room to progress.
You will see three slots on the sides of the Table back at the Totem Vault. Place the Medallions inside one by one. If you do it correctly you’ll receive the Shroudbreaker.
Take it, return to any outpost, and give the Shroudbreaker to the Mysterious Stranger. He will reveal that the Shroudbreaker is missing some gems and that perhaps Madame Olivia at Plunder Outpost will know more.
Mercia’s Lost Memories – Shroudbreaker
There are five journals belonging to Mercia that can be found as part of the Shroudbreaker story. Collecting all five journals is required if you want to unlock all commendations and the special cannons on offer.
Each journal will point you to the location of the next journal. Finding where the journals are on each island is the tricky part.
The journals only appear when the quest is active. If you hand in the Shroudbreaker, the journals will disappear and you must vote for the voyage again.
N13 uncharted island: The first journal is located at the wreck of the Magpie’s Wing, on the sand of the middle-ish island.
Ancient Spire Outpost: Start at the back of the tavern and cross the rope bridge. Follow the bridge down and into the cave. Turn left and look between the candles to find the journal.
Devil’s Ridge: This journal is found on the north-east side of the island, up on the raised cliff near the cannon. This ledge is also where you can find the entrance to the island’s cave system. The journal is resting right beside the cannon.
Thieves’ Haven: Enter into the middle of Thieves’ Haven and look across from the ship wreck. You’re looking for a little sheltered area with a few crates. Search the box on the ground to find the journal.
Plunder Outpost: The final journal is beside the Gold Hoarder’s tent, sitting inside a rowboat near a campfire.