
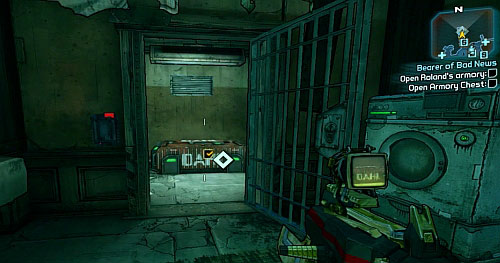
Now it’s time to figure out what’s happened to Roland and who this Firehawk character might be. Your first clue will be on the second floor of Roland’s home. You’ll find his safe, which can be used to store your extra guns and equipment, and in it you’ll find an ECHO recorder from the Firehawk. He says to go to Frostburn Canyon or innocent people will start dying. Well, you can’t let that happen, so your next destination is going to be Frostburn.
You’ll find the canyon’s entrance south of Sanctuary. When you reach the spot where you found Corporal Reiss’s destroyed vehicle, head east across the ramp bridge and it will drop you off in front of the entrance. A crew of Bloodshot bandits will be guarding the way, but after the experience you’ve built up following this guide you’ll best them with ease. Loot the containers around the entrance then head in side.
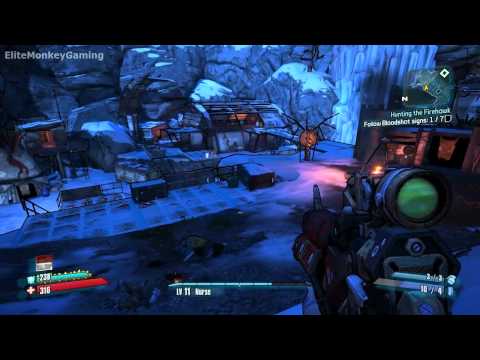
As soon as you enter the canyon you come to find yourself in the middle of a battle between the Firehawk’s forces and the Bloodshot’s. In order to find out where the Firehawk is holding up just follow the trail of destruction the Bloodshot’s are leaving behind. Follow the trail down to the frozen lake and you’ll see the two sides taking each other blow for blow. Let them thin out each others ranks before you start firing at them. The Firehawks troops are all fire resistant. Sticking to non-incendiary weapons is your best bet to beating them.

After clearing out the frozen lake you’ll see the next battle sign near a tunnel entrance to your right. As you head through the tunnel you’ll come across several more of the bandit war. Some spiderants have joined the fray too. Once again let the opposing sides duke it out, then start dealing your own damage to the goons. When the area is clear search the containers for some loot and follow the steps south which will lead you to another group of Firehawk bandits. There will be a loot goon in the bunch. He’s tough, but when you bring him down you’ll rewarded with the nice gun chest that is attached to his back.
The fourth battle sign is next to a large flight of steps. Follow them up and then head forward through the canyon. A burning psycho and a badass psycho will hop into your path. Kill the burning psycho as quickly as possible to start dealing with the badass psycho. He’s tough, so don’t be afraid to retreat back to the bottom of the steps to deal with him. When he’s finished head back up where a second badass psycho will appear. Follow the same strategy as with the first badass psycho.
Continue to the fifth sign of battle. Take a right and you’ll come across a spiderants nest. Deal with the spiderants and continue pushing forward. You’ll find more bandits up ahead. They’re a group of burning nomads with deadly flamethrowers so keep your distance. After dealing with them you’ll find yourself in Ashmouth Camp this place is crawling with bandits.
Stay on the walkways and deal with the bandits patrolling them. They’ll mostly be nomad pyros so be prepared for a fight. Use the elemental barrels on the walkway to deal some extra damage to the over grown psychopaths. There will be a few enemies below, along with more elemental barrels. Follow the same strategy as with the enemies on the walkway and destroy the barrels to deal extra damage when they get close enough.
Follow the steps down to bottom of the camp. More enemies will appear as you approach the entrance of the Firehawk’s lair. Once the lower level is cleared do some looting and head towards the entrance of the Firehawk’s lair. Heed Angel’s advice and watch out for fire traps. Two badass psychos will also be making an appearance as well. Luckily they show up one at a time. Tactically retreat from them and use your ability and strongest weapons to make short work of them.

Continue pushing through the lair. You’ll eventually come to the center of the Firehawks lair. There will be a couple of vendors before you reach it, so be sure to stock up on ammo and health. As you approach the central hub, you’ll see a group of Bloodshots trying to take on the Firehawk. Head towards the fight to deal with both sides.
Turns out you won’t have to take down the Firehawk. It’s our old vault hunting friend Lilth who’s been masquerading as the Firehawk to keep the bandits in-line. She’s exhausted her powers after little stunt to kill the bandits. She will need some eridium to regain her strength and points you in the direction to nab some. Bring the eridium back to her and she’ll be as good as new.

As soon as she regains her footing, more Bloodshots begin breaking into the lair. Help Lilith with these brute. The bandits will be pouring in from the northern platform. It’ll be a mix of all the different Bloodshot types, from marauders, to psychos and a few badasses thrown into the mix. Use your ability and stay on your toes to handle the large number of bandits. Lilith will offer plenty of help with her phase blast, if you’re running into too much trouble.
Grab some more ammo with the in between lull of fighting. More bandits will begin appearing from the east platform in the lair. Follow the same strategy from the first round of enemies. When everyone is dead, Lilith will return to the center of the control room. She’s going to need another eridium booster and she’ll point you in the direction of the purple stuff. Hand it to her and she’ll be ready to discuss the next step in saving Roland.
REWARD:
Money: $22
Experience: 1187
Item: Random class mod
Back to the Full Borderlands 2 Guide