

So you want to be a master of Pokemon? Do you have the Origami skills to be number one?
Everyone needs a little Pokemon buddy to keep them company during the long office days. Create an Origami Pikachu with these simple steps.
Get Some Yellow Paper
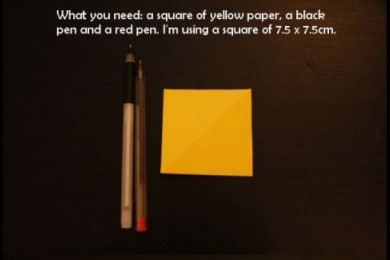
Unless you’re going for the ‘shiny’ Pikachu look you’re probably going to want yellow paper or a post-it note.
If you have some actual yellow Origami paper you’re two steps ahead of us in the office.
Step One: Fold the Paper in Half
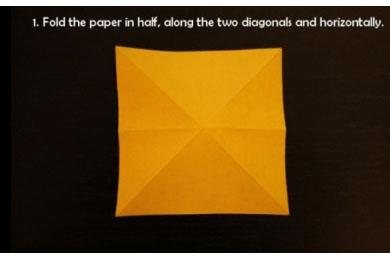 You’re just beginning on your journey so it start pretty easily.
Fold the paper in half, along the two diagonals and once horizontally.
Step Two: Draw on Pikachu’s Face and Ears
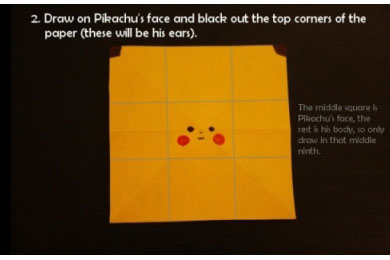
You don’t need to draw the blue lines, just focus on getting Pikachu’s face on what would be the centre square.
Black out the top corners for the cute little Pikachu ears. It’s probably worth blacking out both the front and back of Pikachu’s ears, or at least being able to see the black a little from the other side.
Step Three: Origami Time!
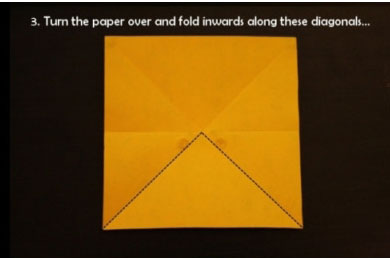
We’re getting into some interesting folds now. Before this it was creating creases, this is Origami time and you’re about to become an Origami Pokemon Master!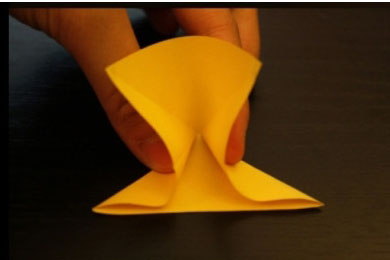
Did you fold that like a champ? Of course you did!.
This was some Pallet Town beginner folds but everyone has to start somewhere. Professor Oak is counting on you to get out there and fold some Pokemon.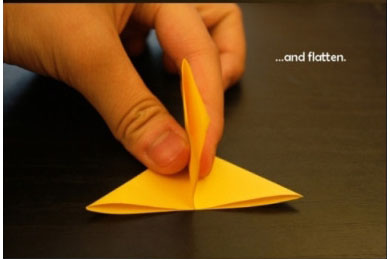
Step Four: Flatten the Vertical Bit
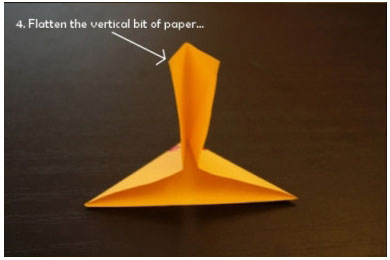
This bit is a little tricky depending on your spacial awareness and ability to follow along with pictures. It took me a little while to take your time with this step.
You’re creating two layers of flaps with this fold and the ears are on this top flap in opposite corners. If I remembered any geometry I’d be confident in telling you this creates an ‘Equilateral Triangle’ shape… but I’m not super confident so correct me in the comments below.
Step Five: Fold the Sides Upwards
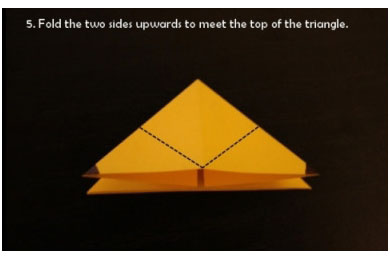
You don’t need to draw a dotted line, just fold the top flaps along it. This is the first step of turning our Pikachu triangle into a Pikachu diamond.
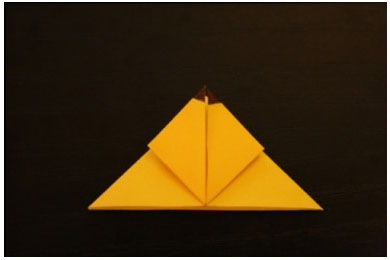
Step Six: Also Known as Step Five Revisited

You know that fold you just did? Flip this bad boy over and do that again. I know this is a bit of a grind, but what would a Pokemon task be without a bit of grinding after the half-way mark.
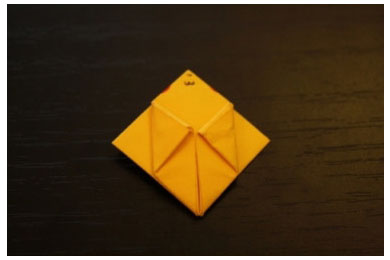
Step Seven:

Fold along the dotted lines as seen in the picture above.
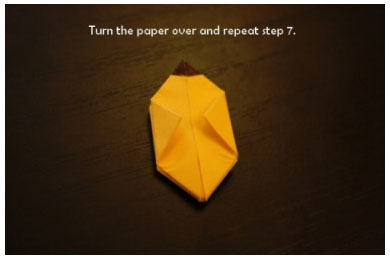
Step Eight:

So you’re not grabbing the whole top here, just the top flaps and folding them down to almost look like little Pikachu feet. They’re not that, but we’re getting close.

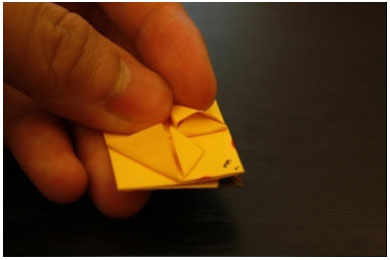
Step Nine: Tuck the flaps

This bit is a little fliddly, if you’ve used a smaller piece of paper this step gets much harder. Be patient and get those little flaps into the pockets.
If you’re having trouble getting it all to line up, don’t be afraid to unfold your recent folds a little to ‘force it’… at least that’s the way I went and you’ll see below that it didn’t turn out so bad.
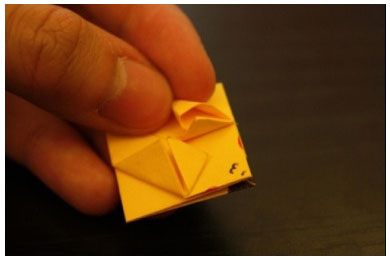
Turns out Origami is tough, this requires patience and dexterity… at this point in the Origami Pikachu I seriously questioned putting all my points into Charisma and leaving Dex as my dump-stat.
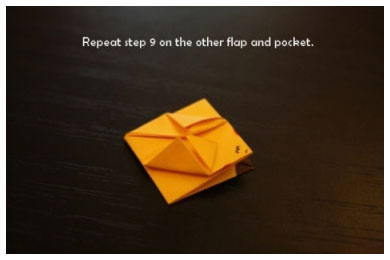
Repeat Step Nine: Final Stages
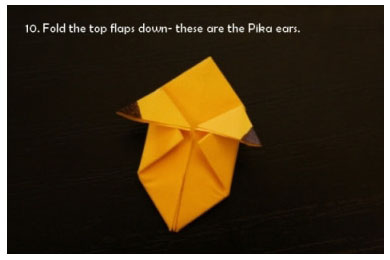
Step Ten: Flop The Flaps
Step Eleven: Blow Pickachu’s Hole
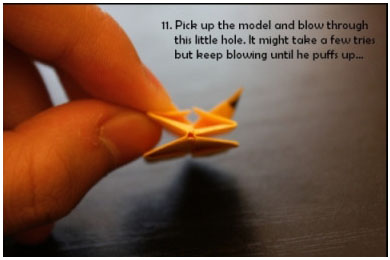

Yes, you just put your lips to Pikachu’s butt and inflated him with ass to mouth. Look buddy, I’m not going to tell anyone that’s what you did. Maybe you shouldn’t be blindly following step by step guides on the Internet without reading ahead.
I found that this didn’t even work for me when I used a Post-It note, so… I ineffectually put my lips to a paper Pikachu hole.. If you’re using a strong-ish paper that doesn’t take well to blowing (I’m sorry) then you’ll have to be creative and gentle to manipulate the Origami Pikachu into a rigid shape (sorry again).
Huzzah, we’re at the super cute phase of the project. Depending on your drawing skills in the first phase you’ll see how cute Pikachu becomes in 3D.
If you’ve created some kind of misshapen horror that’s begging for the sweet release of death… the good news is paper catches fire easily.
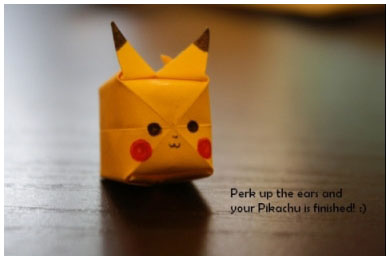
Origami Pikachu: Nailed It!

There you have it. Your very own Origami Pikachu to sit on your desk and keep you company.
Good job!
It was an isosceles triangle.